Bunny Hop Before Beast Mode – Improve Basic Handling Skills

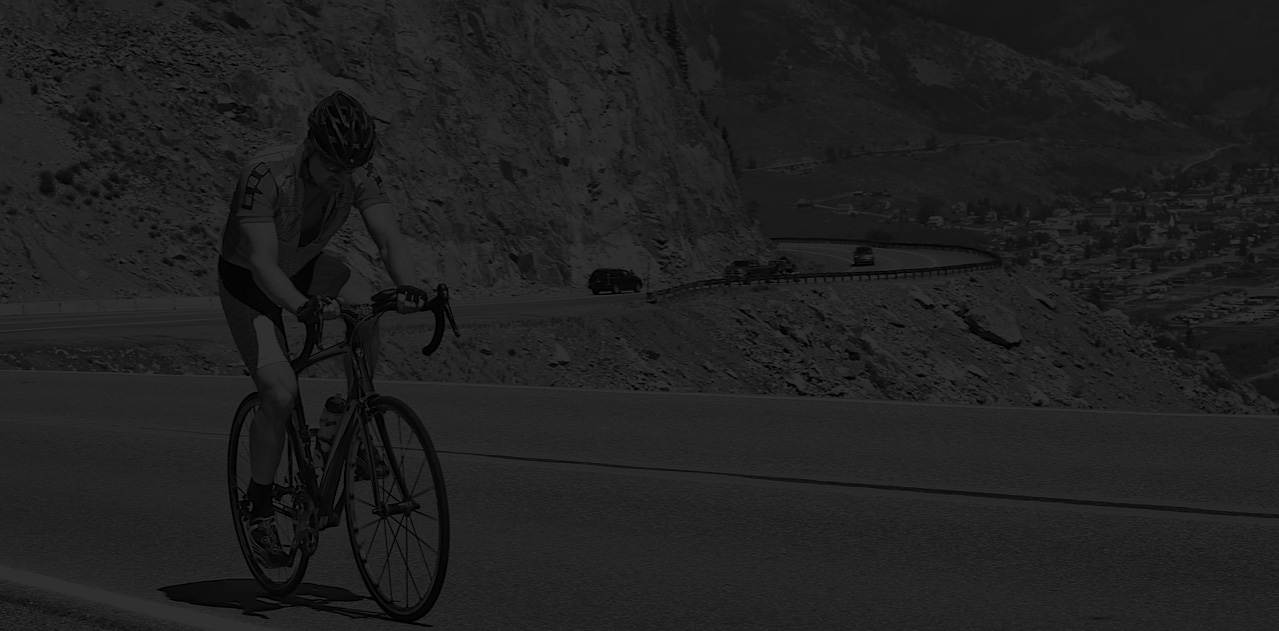
Having the ability to control your machine makes being on two wheels much safer and, in turn, much more fun. It’s great to be able to hammer and make people suffer, but what the people you are riding with will appreciate much more, is if they know you are the least likely person to cause a group pile up. If you are new to the sport of cycling, we suggest doing bike handling work as much as possible. If you are a vet, regardless of experience or race category, it is never too late to spend some time on bike handling. Besides being able to get yourself out of a bad situation, there are a lot of energy savings gained through solid bike handling skills.

This program will take you through the major bike handling skills that all riders should aspire to have. We suggest working on at least one skill every day until you are very confident in your ability. Don't move on to the next skill until you are at least able to execute the drills that accompany each skill.

The Completion Level of Your Training.

0.00%


Intro to Bike Handling


Why Bike Handling is So Important


Next


What You Will Learn in This Program


Next


Executing a Bike Handling Session


Bike handling sessions can be extremely fun but also a little dangerous if you don't don't take some simple precautions. Below are our tips for the where, when, and how to execute a quality bike handling session.

  1. In the off season, bike handling work can be added into any workout, or done as a stand alone session.
  2. During the season, bike handling sessions are best for easy or recovery based workouts.
  3. For balance work and things like bunny hops, it's usually best to start on a soft but stable surface like grass. Not all grassy areas are created equal so make sure you check for holes and other hazards.
  4. For on-road specific skills, make sure you are not on a busy road, and make sure to obey all traffic laws. Empty parking lot are great places to practice as long as you have permission.
  5. Start your drill work at the easiest part of the progression and don't move on until you have mastered the first step.
  6. If your muscles start to fatigue, move on to another skill, or end the session. Some skills require more coordination and musculature than others. If you can't properly do the movement because you are tired, you likely won't be making much improvement that day.
  7. ALWAYS WEAR YOUR DANG HELMET.

Next


Starting and Stopping With Clipless Pedals


Starting and Stopping Video


Next


Hydrating and Fueling While Riding


Grabbing a Water Bottle


Next


Retrieving Nutrition From Rear Pockets


Next


Holding A Straight Line


White Line Drill


Next


Look Back Drill


Next


Bike Balance Series


Slow Ride Drill


Watch the video and then get out and practice. Don't move on to the next drill until you feel confident in your slow riding ability.

Next


Track Stands


Track stands are the epitome of bike balance. It shows that you have full control over your machine.

When first learning them, you can try on flat pedals, or even on a mountain bike, which offers a more upright and balanced position. They can be very challenging at first, but when mastered, really score you some cool points...or safety points. Whatever.

Next


Body/Bike Separation


Bike body separation is an important skill to be confident in, especially for those looking to improve their cornering. Make sure you have worked on slow riding before working on bike body separation.

Hint: Make sure you are finding a balance point between forward and backward positioning. Generally, you have more balance leaning the bike or your body if you are farther back.

Next


Pick Up Drill


Next


Cornering


Cornering Basics


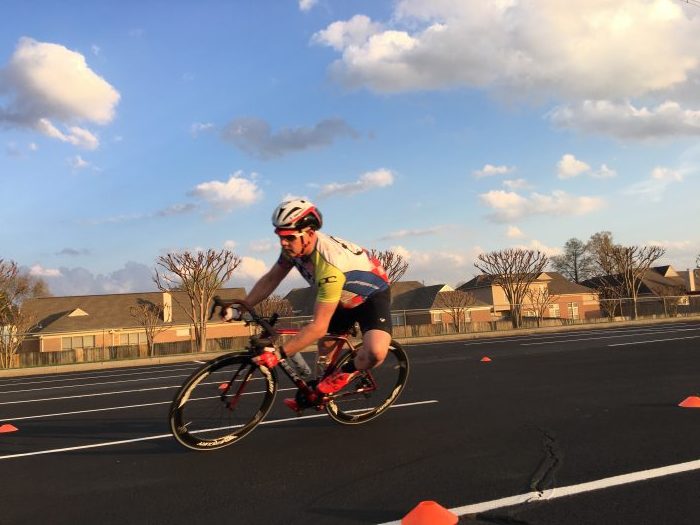
The ability to corner efficiently is a serious skill that can mean the difference in taking the win, avoiding a wreck, or simply overworking yourself into a glorious fireworks display. The main reason for superior cornering ability is always safety, but efficiency is a close second.

Let's say you are doing a 4 corner crit, or a nice long hard group ride with a ton of turns. If you are inefficient through every turn, you will get gapped by the person in front of you. That forces you and the people behind you to have to work harder, even for just a few seconds. But multiply that spike by the number of turns and BOOM GOES THE DYNAMITE!

With that, here are the major cornering basics, in order, to help you rail those turns with superior confidence:

  1. You are best suited to corner in the drops since you have a lower center of gravity. The more upright you get, the less predictable your bike will handle.
  2. Make sure you move to the far outside of the turn. So if you are turning right, move far left. Obviously this will be determined by the road you are on and the group you are riding in. Make sure your movement to the outside is smooth and predictable by the other riders so they can give way if need be.
  3. Scrub any speed you need to by feathering (grabbing lightly) the brakes BEFORE you get into the arc of your turn. DO NOT brake while in the arc of the turn.
  4. Shift into an easier gear so that you don't have to grind a big gear when you get out of the turn. This is a huge mistake people make all the time.
  5. Make sure your inside foot is up around the 12 o'clock position.
  6. Your outside leg will be straight and you will have the majority of your weight on the outside foot.
  7. Start your turn early and aim for the apex of the turn. This is generally the inside corner of any 90 degree turn.TURNIMAGE
  8. To start your turn, lean the bike (not necessarily your body) by putting pressure down (straight down toward the ground) on the inside hand. You can also add inside pressure by turning your knee out and pointing it towards the ground.
  9. The faster you are going, the more you may need to scoot back on the saddle and sink your chest lower.
  10. Make sure you turn your shoulders slightly into the turn and physically look where you want to go. Initially at the apex of the turn, and then to your exit point. If you look at the curb, you will go toward the curb!
  11. Do NOT start pedaling until your bike starts to get vertical again.
  12. Exit the turn once again on the far side of the road.

Next


Race Footage Cornering Example


For our visual learners, here's a walk through of how these cornering skills play out in a race (or group) situation.

Next


Practice - The Long Arc


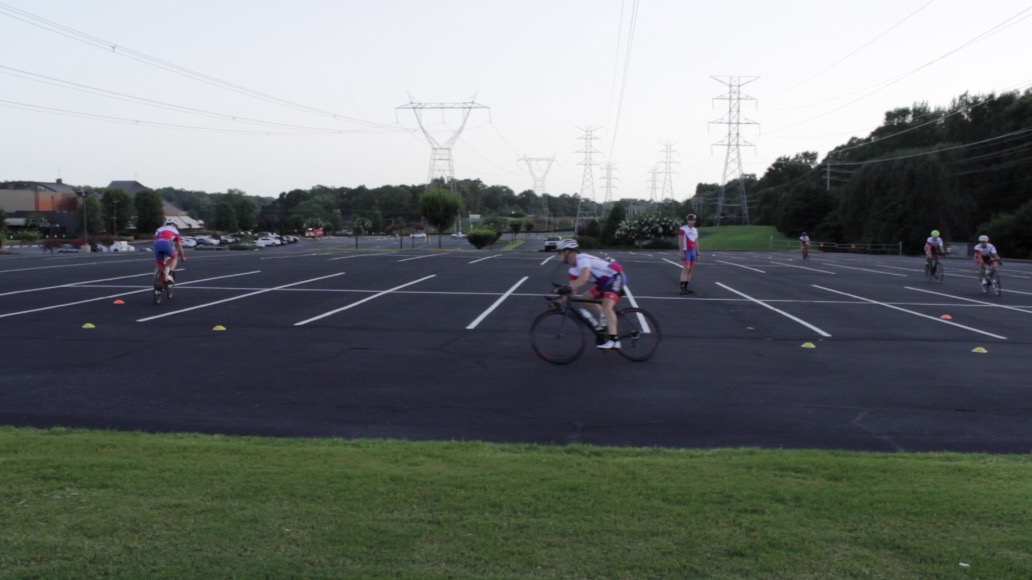
Practicing a tighter arc is a technique we use to get people comfortable with leaning the bike (and less so the body) and to help them feel what it's like to carve a turn. A half circle forces the rider to hold the pressure on the inner hand and outer foot longer than a 90 degree turn.

You can mark off a half circle about 24ft wide (slightly wider than your average U-turn space), with an inner and an outer loop. You will stay on the inside of both arcs as if it's a road between them. The inner arc will be to sight your apex, and the outer arc is theoretically your curb. If you use cones, you can always bail out if you need to. Practice going both ways, and increasing your speed as you get more comfortable.

Tip: If you go too slow you will feel really off balance and twitchy.

Remember!

  1. Downward hand pressure on the inside hand
  2. Take all bends out of the outside leg and drive that heel down
  3. Open the inside knee to help lean the bike
  4. Turn your shoulders inside slightly as you look through the turn, sighting the apex, and then your exit

Next


Practice- 90 Degree Turns


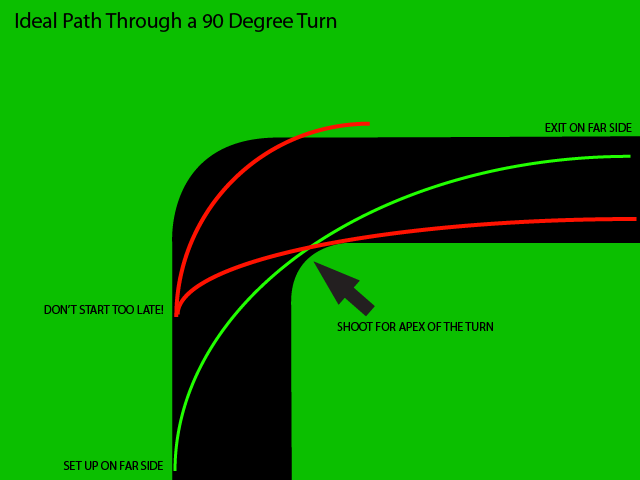
90 degree turns are the most common and often the rider is turning off one road onto another adjacent road. At high speeds, 90 degree turns should NOT be pedaled through due to the amount of bike lean and the risk of clipping your pedal on the ground.

Here are our suggestions for practicing 90 degree turns:

  1. Find a safe road or parking lot to practice in. If in a parking lot, set up a 90 degree turn with cones. Also make sure to mark an imaginary "curb" on the outside of the turn. The total width of the course should be no bigger than 12ft wide, or one car lane.
  2. Make sure you've read over all the cornering basics above
  3. Start slower and feel out applying the inside hand pressure first, and then putting pressure on the outside foot that is at roughly 6 o'clock.
  4. DO NOT forget to look where you want to go. Pan your line of sight through the entire turn from the set up, to the apex, to the exit point, to up the road.
  5. As your speed increases, work on getting your butt back and chest lower to take the turn at higher speed.
  6. Finish your turn with a slight acceleration out of the saddle.

Next


Practice - Sweeping Turns


A sweeping turn is one that is greater than 90 degrees, or is an extremely wide turn. Many times sweeping turns involve entering and/or exiting the turn on multiple lane widths and not just a single lane of the road. Even at 90 degrees, many sweeping turns can be pedaled through due to the gradual arc you can take through them. They require a lesser degree of bike lean and are generally safer, especially in a group. Sweeping turns also have multiple good lines and apexes depending on where you start the turn from.

Here are our suggestions for practicing sweeping turns:

  1. Set up in an empty parking lot, or find a safe wide turn in your neighborhood. If in a parking lot, set up a half circle arc about as wide as 3-4 car lanes, so about 36-48 feet in diameter.Screen Shot 2016-07-26 at 11.09.15 AM
  2. Practice first pedaling through the turn and leaning the bike predominantly with inside hand pressure. Then increase the speed into the turn and try without pedaling.
  3. If you can pedal through the turn, stay focused on inside hand pressure and looking through the turn to your exit point.
  4. Then decrease the size of the arc and work to take more speed into the turn.
  5. As you feel comfortable and pick up speed, start applying more pressure to the outside foot and DO NOT pedal through the turn.
  6. Make sure you practice in both directions!

Next


COMING SOON


Stay tuned for our more in depth training program to get you cornering like a pro! If this is something you are very interested in, speak your mind on the CA Members Facebook Page

Next


Performing a U-Turn


Why Do I Need to Practice U-Turns?


Next


U-Turn Execution Video


Next


Bunny Hop Progression


Why Do I Need To Know How To Bunny Hop?


Next


Progression 1 - Front/Rear Wheel Hop


Next


Progression 2 - Basic Bunny Hop


Complete Course